Hannah and I were feeling very brave recently and decided to pull up the carpet in our living room and study to redo the old hardwood floors underneath. This was a really fun project and we are really happy with the end product. Here's a picture summary of how it all went down.

We had to move everything out of two rooms and our house was a mess. Our neighbors were nice enough to let us keep the big furniture in their garage. The rest of the stuff went where ever we could find a place.

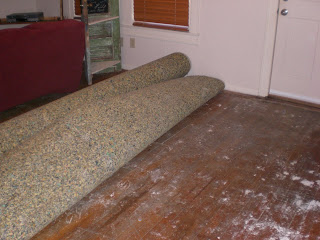
Then the carpet had to come up. Check out how nasty those floors are

The first big problem we ran into was a 2 x 2 foot piece of plywood that had been used to cover a hole where an old floor vent had been. In order to patch this up, we pulled some boards out of one of the bedroom closets. This was a pretty tricky little challenge but we got it taken care of.

We used a chisel and hammer to knock out a few extra boards so that the repair would look blended ("feathered" is the official term) with the rest of the floor.

Here is the closet after it the wood has been pulled up. We used a circular saw set to the 3/4 inch depth of the floor and a dremel tool to cut out a perimeter, then a crow bar and lots of elbow grease to get the boards out.

Here is the floor after it's been all patched up. Now onto the sanding.

Here's the floor pre-sand with the baseboards removed

We rented a drum sander with the money we made from selling our carpet on craigslist. Here were are getting started

Here's a close up after the first pass with the sander. We sanded with a course 36 grit and then then with a fine 80 grit

Hannah working her magic on the sander


After the sanding is done

With the polyurethane

The finished product, furniture and all
 The best piece yet, a TV cabinet out of old salvaged wood
 Looking good so far. Watering and fertilizing seems to be doing the trick.


